Getting Started
This page walks through installation, initial setup, and a first run. By the end, you should be ready to anonymize your first database.
System Requirements
Before installing, make sure your environment meets the following:
| Component | Minimum | Recommended |
|---|---|---|
| Microsoft Access | Office version 2508 (required for VBA.RegExp) | Microsoft 365 (32- or 64-bit) |
| Windows | Windows 10 | Windows 11 |
| Macro Security | Medium (prompted) | Trusted Location enabled |
Installation
Installation is straightforward:
- Download the zip file Anonymize.zip.
- Extract it to a permanent folder (for example,
C:\Tools\Anonymizer\) that is also a Trusted Location. Make sure you unblock the file (clearing the Mark of the Web) after download. - Copy
SimilDll.dllto \Windows\SysWow64 (if using 32-bit Access) or \Windows\System32 (if using 64-bit Access). - Ensure ODBC 18 and OLEDB 19 drivers are installed.
- Open
Anonymize.accdb.
On first run, Access may prompt you to enable macros. Go ahead and enable them.
Once the application starts, you'll see the Home ribbon tab:
 Figure 1 — The Anonymize ribbon.
For a first run, the Northwind Starter and Dev Editions are a good choice. The screenshots below use those databases.
Open the Anonymize form. Enter the full path to the Starter Edition in the New box. If you use Windows Explorer → “Copy as path”, the quotes are fine. Click Attach.
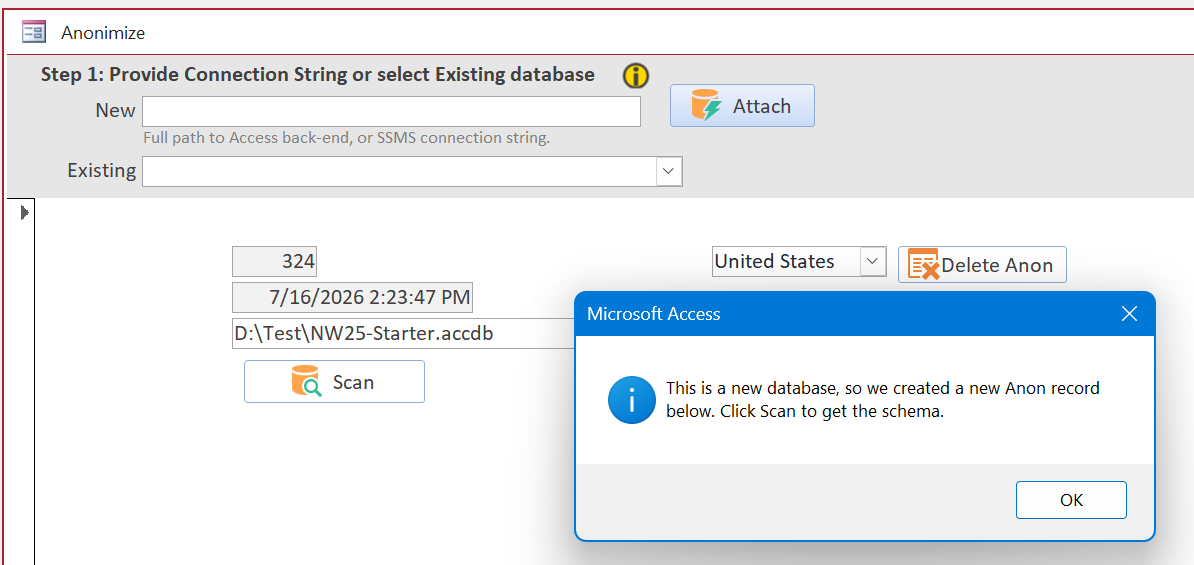 Figure 2 — After Attach.
Check the Country field (it's used later by some converters, such as PostalCode). Then click Scan. When the scan completes, the grid fills with schema data.
Only tables with single-column numeric or GUID primary keys will be scanned.
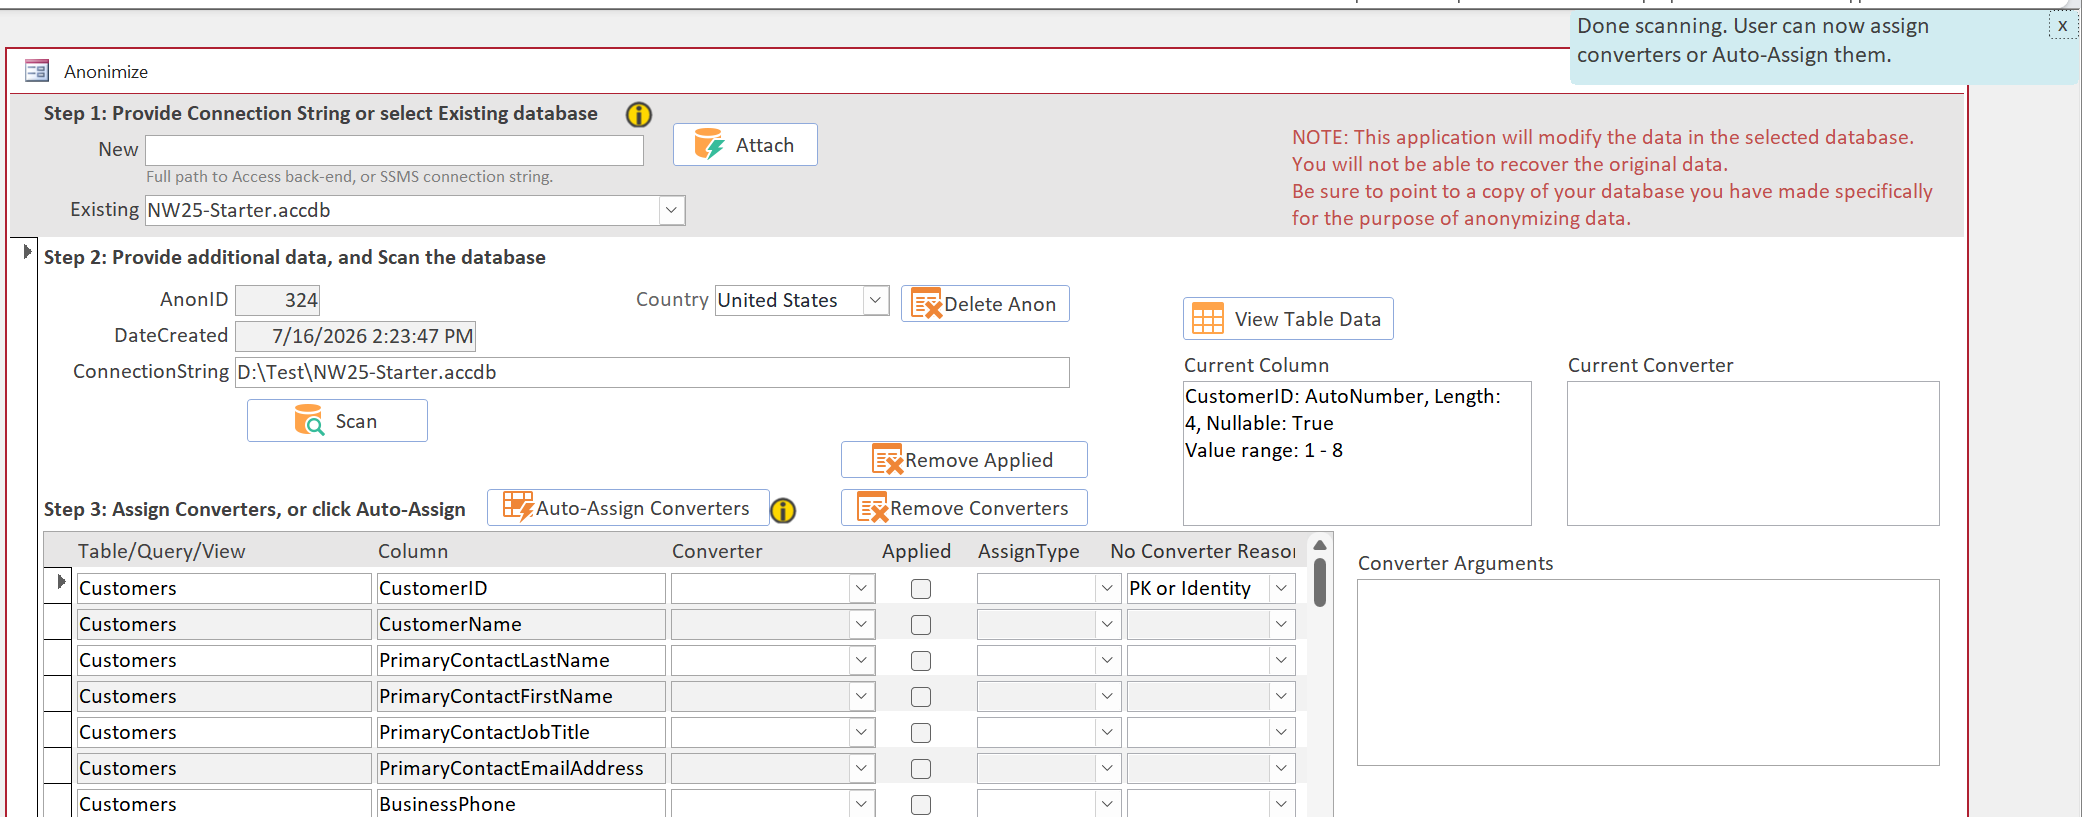 Figure 3 — After Scan. Note the blue informational Notification.
Select a few converters to get started. Some require additional settings in the Converter Arguments panel on the right.
See the Converters page for more details.
 Figure 4 — After Manual Selections.
Click Apply Converters.
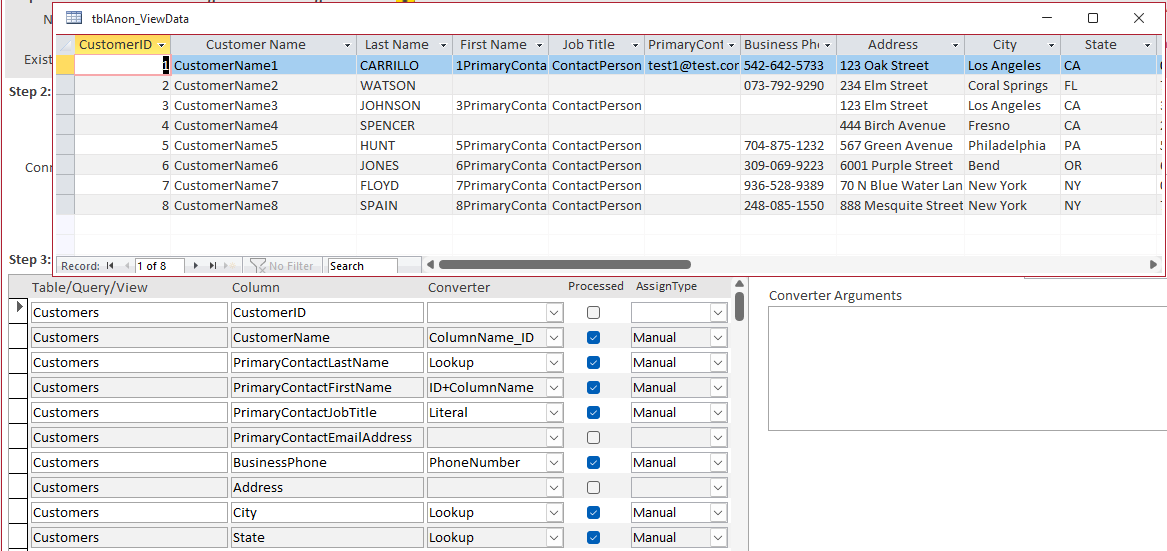 Figure 5 — After Applying Converters.
This screenshot shows the converters and their effect on the table (after selecting View Table).
Auto-Assign
Auto-Assign can save time right away. As you process more databases, it gets better at choosing the right converters.
In the NW2-Starter example, you likely selected the Lookup converter for Customers.City and State.
Now try this: paste the path to the NW2-Dev database into the New box and click Scan. Then click Auto-Assign.
Auto-Assign uses all available information (including previous databases) to choose a converter for each column. The Companies.City and StateAbbrev fields should again be assigned the Lookup converter.
See the Auto-Assign page for more details.
You've got the basics now. The following pages go into more detail and show how to fine-tune Anonymize.